Step 2 - Correct Crop Size & 300DPI
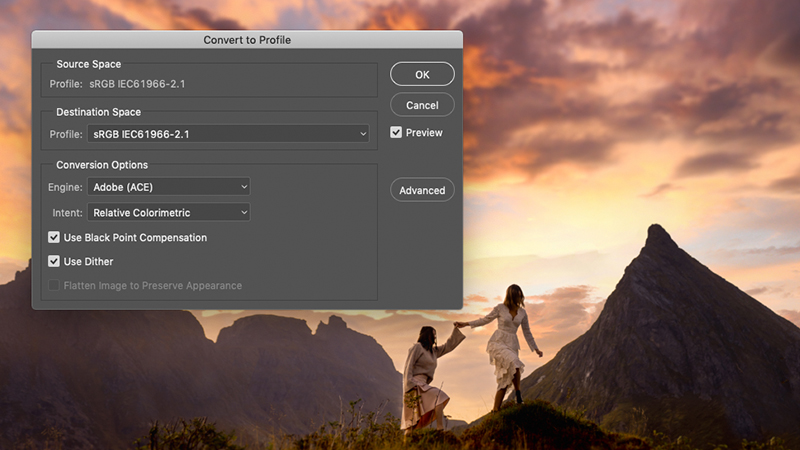
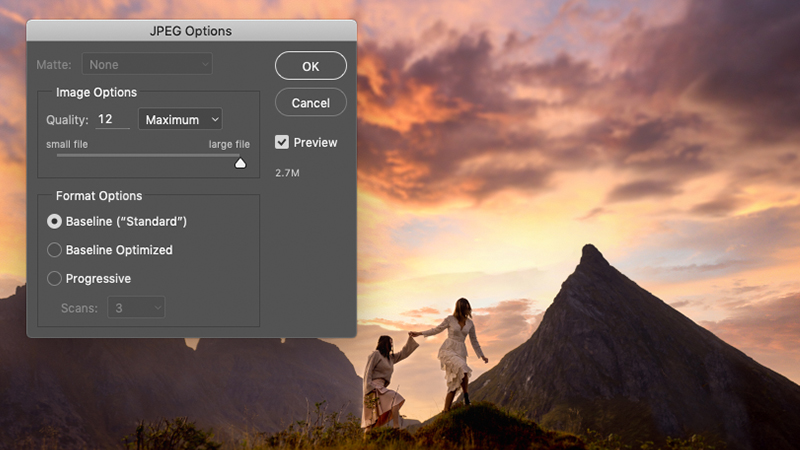
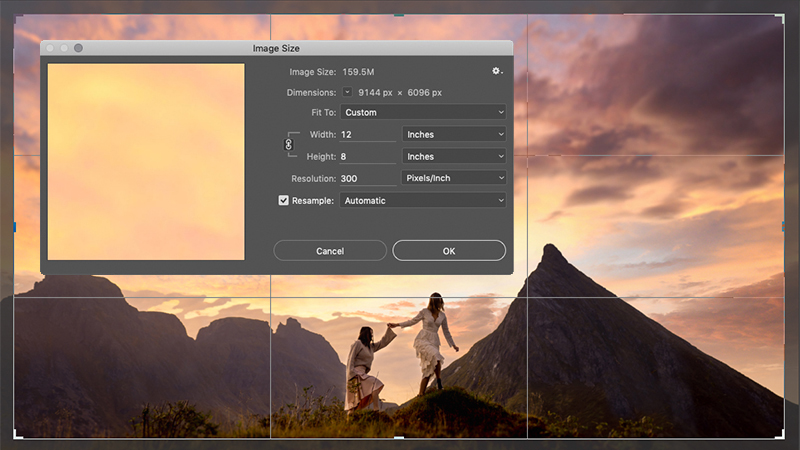
Please crop your images at your chosen print size at 300DPI. This will ensure your image prints with professional quality and detail even under close inspection.
We do not recommend using the online crop tool to zoom in on images or to adjust the ratio of your images if it does not match your selected print size.
We require 5mm of bleed on every edge of your image that can be trimmed during printing. Please ensure all important elements in your image such as hands, heads, feet, text, logos etc are well within your safe margin and more than 5mm away from the edge of your picture.